Wednesday, April 8, 2009

Renewal


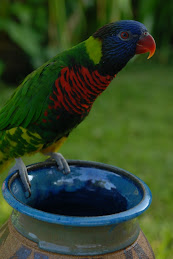
Here in California over the last several weeks, the trees and flowers have awakened from their slumber and have burst forth with new growth. It's an exciting time to be alive and smell the fragrant air. I love spring and all that it represents. I'm also going to make an attempt to awaken this poor, neglected and hungry blog and feed it some interesting pottery morsels! Last session, I demonstrated some new and exciting techniques. I showed my students how to make these sweet little bud vases made from slab formed bowl shapes. Had great fun with texture on these little gems! (that's our lorikeet Missy posing with one of my bud vases) Also made some interesting wheel thrown bowls that I cut and altered. After watching a Mitch Lyon's video on inlaying colored clay, I demonstrated my version of this technique. It was exciting and fun, but realize I need to make sure the clay is kept very damp and dried slowly otherwise it can separate during the firing, which happened to several of my vases. Patience, patience is required here! Here are some of my latest finished class projects.


Saturday, October 25, 2008

WOOD You Believe This??


I recently purchased a pottery tool called 'The Steve Tool'. It makes fabulous texture on the surface of your wheel thrown pot and I wanted to show you my favorite pot from a group of pots I made using this ingenious device. Doesn't the surface look like the bark on a tree? Steve, whoever you are, YOU are a genious! and I thank you!

Mug Shot


Mugs are some of the most common objects potters make. They can be made in all different sizes, shapes and colors. They can be extremely funky or very traditional in form. Recently, I've made a few and I'd like to share them here with you.

Wednesday, October 1, 2008

Pumpkin Season


I've been on hiatus from blogging due to a schedule that's been relentless, but I thought it was time to give everyone a clay update! As many of you know, I love making pottery pumpkins. I've been creating these for years and I just 'harvested' a new batch a few weeks ago. I make these on the pottery wheel and they begin as hollow spheres. I add the detail and alter them until I'm satisfied that they somewhat resemble what you'd see in the pumpkin patch. This year I also made some pumpkin pin jewelry. These came about rather unexpectedly when I was trying to come up with a new textured handle. At one point, I saw that the texture reminded me of the ridges in a pumpkin and began making miniature ones. I had so much fun creating these that before I knew it, I had made a slew of them. Serendipity! That's what I love about working with clay and leaving yourself open for discovery. Here are my latest pumpkin creations....

Sunday, August 3, 2008

Split Rimmed Pots


I was inspired recently after watching a 'how-to' video on how to make a vase with a split rim. I decided to do it as a class demonstration and the results were impressive. I don't have pictures of the actual process, but here are pictures of the finished vases. The trick when your making these is to leave extra clay at the rim. Also, when you make the grooves in the rim before you pinch the clay together, use a pencil point. It makes the perfect spacing between the grooves. I'd love to work on this technique and do something really unique with it. I have a few ideas and maybe I'll post something one day.....

Sunday, July 13, 2008

Clay Trays!!!


Inspired by some wonderful Japanese ceramic trays I had seen years ago, I decided to make these sweet serving trays as a class demonstration last week. I began by rolling out slabs and extruding a variety of coils. I textured the slabs with some stamps I had made and then cut out the various shapes I wanted the trays to be. I added the extruded coils to the perimeter of the slabs to create the edges of each tray. One trick I showed my students was how to cut a round coil in half by placing two strips of wood half the thickness of the coil on either side of the coil and then resting a wire cutter on the wood and cutting through the coil lengthwise (see picture). This will give you a half-round coil which can be used for an interesting edge. On one of the trays I curled a flat extrusion to create handles, scoring them onto each side of the tray. By weeks end, I completed a variety of trays and now I'm thinking of making sets that fit in one another...you may see those pear shaped trays in sets of 2 or 3!!

Again thanks to Norma for taking great pics of each step!

Wednesday, July 9, 2008

Juicer Demo


The first week back to class for the summer session and I began with a demonstration on how to make a juicer. What I really like about this design is that it has a catch bowl to collect the juice, a built in strainer, and a spout for pouring. I've seen them before, but I've never attempted one like this so I just had to do it!
First, I threw the juicer part which is hollow and made sure I made a little reservoir for the juice and seeds to collect. I measured carefully with my calipers the diameter of the lip of the juicer top. I then threw the bowl shape with a 'gallery' to hold the juicer making sure the measurement was accurate for a tight fit. I finished it off by trimming the underside of the juicer part when it was leather hard, carving the grooves in the dome shape, and drilling holes in the bottom curve to enable the juice to drain out and hopefully leave the seeds behind! I added a handle and spout to the bowl. Both the spout and handle were made from slabs and scored and attached in place. A section from the side of the bowl was cut out to enable the juice to pour from the bowl. Here are the step by step pictures. Will be using this in a few months when there are lemons galore!! A huge thank you to Norma for taking some great pictures!