Wednesday, July 9, 2008

Juicer Demo


The first week back to class for the summer session and I began with a demonstration on how to make a juicer. What I really like about this design is that it has a catch bowl to collect the juice, a built in strainer, and a spout for pouring. I've seen them before, but I've never attempted one like this so I just had to do it!
First, I threw the juicer part which is hollow and made sure I made a little reservoir for the juice and seeds to collect. I measured carefully with my calipers the diameter of the lip of the juicer top. I then threw the bowl shape with a 'gallery' to hold the juicer making sure the measurement was accurate for a tight fit. I finished it off by trimming the underside of the juicer part when it was leather hard, carving the grooves in the dome shape, and drilling holes in the bottom curve to enable the juice to drain out and hopefully leave the seeds behind! I added a handle and spout to the bowl. Both the spout and handle were made from slabs and scored and attached in place. A section from the side of the bowl was cut out to enable the juice to pour from the bowl. Here are the step by step pictures. Will be using this in a few months when there are lemons galore!! A huge thank you to Norma for taking some great pictures!

Sunday, June 29, 2008

Wedding Fever


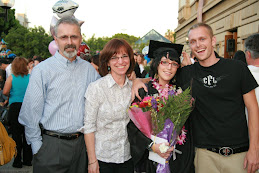
Well, I'm going to apologize to my students right now for not being in my right mind for the next month and a half. My son and fiance are getting married on August 16 and we are in the midst of the preparations. I have offered my pottery skills to help defray the expenses that keep adding up and am glad to do so. So far, I've made the wedding keepsake momentos (140 in all) that guests will be taking with them. They are porcelain hearts that will be attached to a pretty paper with a verse written on it. I've also made mugs for the attendants. The bridesmaids are getting personalized coffee cups with their first names imprinted on them. The groomsmen will have their initials stamped on their coffee cups in a more masculine style. I'm also making all of the flower pots for the reception tables - 12 in all. I have only 3 finished and plan on getting those done within the next week. Here are pics of the things I've finished. Not pictured yet are the flower pots I made for all of the reception tables. I'll add those after the wedding. Students, if I seem a little preoccupied, bear with me..it's only temporary! :)

Friday, June 27, 2008

Pottery Class Pizza Party!!


We had such fun at our last Thursday morning class of the Spring session. We were all invited up to Jennaro's house for fabulous homemade (from scratch) pizza! He stayed home that morning to prepare for us and when we all arrived the dough was sitting there patiently awaiting our eager hands. He had prepared all the toppings and all we had to do was put them together and hand them off to him. He popped them in the oven and out came the most delicious pizza I've had in years! A wonderfully fun time was had by all and I so appreciate Jennaro and Bobbie's hospitality and for opening up their home to us mudders!! Here are some pictures to enjoy thanks to Doris!

Thursday, June 5, 2008

Before and After


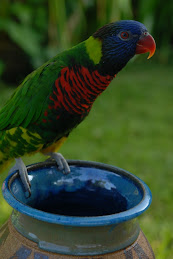
Off to Florida in a few days, but I wanted to share the results of my paper resist technique. To glaze these pieces, I covered the outside with a thin layer of transparent glaze, just enough to give the surface a nice sheen but still allow the stain and texture to be seen clearly. The inside of these pots were glazed with Flambe blue and the rims dipped in Castille blue, a very nice contrast I thought. Holly's lorikeet, Missy, posed with these finished pots! I thought the color on the rims almost matched the blue in Missy's feathers!

Sunday, May 25, 2008

Finishing Up


We're entering the last week of classes at CAC and everyone, myself included, has been glazing and finishing projects from this spring session. It's been a great session and it's hard to believe it's coming to a close. I just wanted to show you some of my finished/glazed pieces that have been featured in my most recent posts. I'm very happy with most of the results and am inspired to follow up on some of the techniques I've shown. That's the way it works with me, one thing leads to another and I'm off again on some creative journey. Lately, I've been overwhelmed with new ideas and wish I had the time to investigate!! Anyway, here are some of my finished projects from the spring session.

P.S.I'm off to Florida on June 7 to visit my mom and looking forward to that.

Wednesday, May 14, 2008

Paper Resist


This week, I revisted a technique I haven't done in awhile. Paper resist! I began by cutting multiple shapes from newspaper. I then threw a rounded vase and when finished I moistened the surface with a wet sponge. I laid the strips of dry newspaper in the desired pattern and made sure the paper stuck sufficiently with a minimum of puckering. The moisture on the surface adheres the newspaper well. I ran my finger carefully along the edge of the paper to make sure there was a good enough seal. I then applied a stain (in this case it was Oriental Rust, a Laguna MS 100 series stain)over the surface where the paper was stuck. After applying the stain, I immediately removed the newspaper to reveal my pattern. Some seeping of the stain is inevitable and I don't even bother cleaning it up. I like the jagged edge that is created and with the additional texture I add, it becomes unnoticeable. I let the vase dry a little (20 minutes in the sun) at which point I used my sgraffito tool to carve lines through the slip and added some additional texture and carving. This is such a versatile technique that can be used on just about any form and works well with slab work, too. Many thanks again to my student Misako for the pics!

Friday, May 9, 2008

Textured Slab Project


This week I brought to class a sheet of plexiglass that had been discarded at my husbands work (He's a model maker). He brought it home a few weeks ago and asked if I could use it. I thought it might make an interesting impression in clay since it had all these circles cut out of it and so I decided to do an impromptu textured slab project with my classes. What fun it was! I brought to class my huge collection of texture tools along with the plexi sheet for my students to play with and here are some pictures of the resulting projects. As you can see, the grid-like texture was just a springboard for more elaborate designs. I kept thinking...less is more..and had to force myself to stop added texture to each piece. I'm thinking of making some more cylinders with this texture technique.